Essential Dovetail Joints for Drawer Construction
Dovetail joints are among the most revered woodworking joints, particularly valued in drawer construction for their mechanical strength and visual appeal. They consist of interlocking pins and tails that resist pulling apart, making them ideal for the corners of drawers that undergo frequent handling. The joint’s geometry provides a large gluing surface and a mechanical lock that withstands the stresses of daily use. This article explores three primary types of dovetail joints—through, half-blind, and secret—and outlines step-by-step cutting guides for each. The information is intended for woodworkers in the United Kingdom, referencing common timbers and tool conventions familiar in that region.
Understanding the distinctions between these joints allows woodworkers to select the most appropriate option based on the drawer’s design, the visibility of the corner, and the desired aesthetic. Through dovetails are the most straightforward and are often used where the joint will be visible, such as on the back of a drawer or on blanket chests. Half-blind dovetails are typically employed at the front of a drawer, where the joint is hidden from view when the drawer is closed. Secret dovetails, also known as mitered dovetails, conceal the joinery entirely, presenting a clean, uninterrupted surface. Each type requires different marking, cutting, and fitting techniques, which are detailed in the following sections.
Oak & Grain, a company known for its woodworking expertise, emphasises the importance of precision and patience when cutting dovetails. While the process can be executed with hand tools or with the aid of machinery, the fundamental principles remain consistent. This guide assumes the use of traditional hand tools, though the methods can be adapted for router jigs or other assisted approaches. By following the procedures described, woodworkers can develop the skills necessary to produce durable and attractive drawers that reflect care and craftsmanship.
Understanding Through Dovetails
Through dovetails are the most traditional and recognisable form of dovetail joint. In this joint, the pins and tails extend completely through the thickness of both boards, so the end grain of both pieces is visible on the assembled corner. This makes the joint strong and relatively easy to cut, as the layout lines are accessible from both sides. Through dovetails are commonly used in drawer backs, carcase corners, and decorative boxes where the exposed joinery is considered a feature. The joint’s strength comes from the interlocking shapes: the tails, which are wider at the top, fit into corresponding pins, creating a mechanical resistance to pulling forces.
To cut through dovetails, begin by preparing the boards square and true. Mark the baseline around the end of each board using a marking gauge set to the thickness of the mating board. The tails are typically cut first on the pin board, but layout can start on either piece. Divide the width of the board into equal segments for the tails, ensuring the outermost tails are half-pins. Using a dovetail saw, cut along the waste side of the lines, being careful to maintain vertical alignment for the pins and angled cuts for the tails. After sawing, remove the waste with a chisel, working from both faces to avoid tear-out. Test the fit frequently, adjusting with a chisel or file as needed. A snug fit that requires light tapping with a mallet is desirable; too loose and the joint will be weak, too tight and the wood may split.
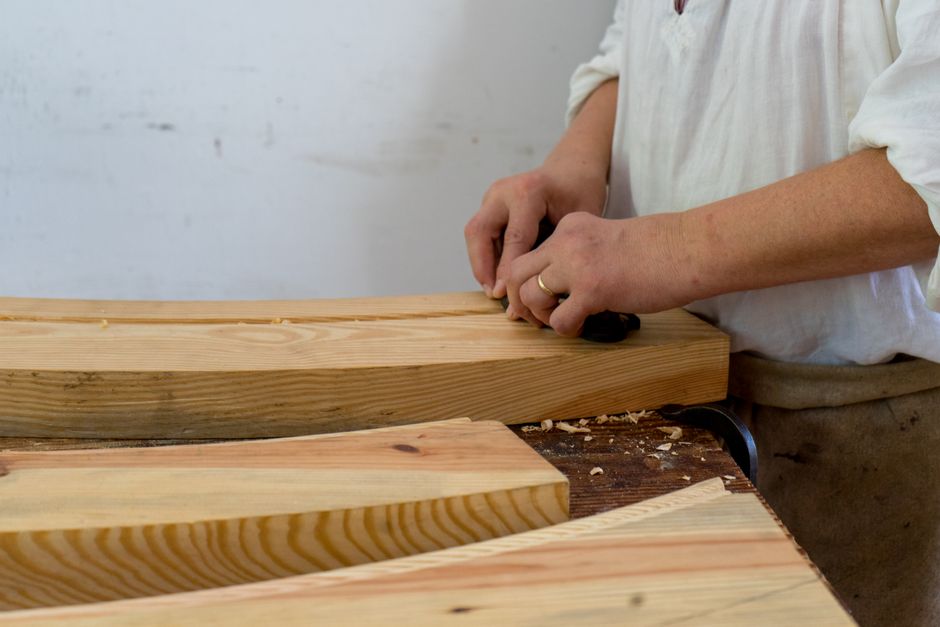
When assembling through dovetails, apply glue to the mating surfaces and tap the joint together gently. Check for squareness and clamp if necessary. Once the glue has cured, trim any protruding end grain flush with a block plane or chisel, taking care to avoid damaging the surrounding wood. The result is a robust corner that showcases the woodworker’s skill. Through dovetails are well-suited to drawers that will be painted or where the back of the drawer is not visible, but they can also be left exposed for a decorative effect.
Half-Blind Dovetails: The Drawer Front Standard
Half-blind dovetails are the preferred choice for attaching drawer fronts, as they are hidden from view when the drawer is closed. In this joint, the tails are cut only partway into the thickness of the drawer front, so the end grain of the front remains intact. This creates a clean face on the front of the drawer, which is particularly important when using attractive hardwoods or when the drawer front is shaped or profiled. The joint still provides significant strength, though slightly less than a through dovetail, because the interlocking occurs within the thickness of the front board.
Cutting half-blind dovetails requires careful marking and precise excavation of the waste. Start by marking the baseline on the drawer side (the pin board) and on the drawer front (the tail board). The tails are cut on the drawer front, but only to a depth equal to the thickness of the drawer side minus a small amount for the baseline. Use a marking gauge to scribe the depth line. Saw the tails on the end of the drawer front, then remove the waste with a chisel, working carefully to avoid cutting below the baseline. The pins on the drawer side are then marked by transferring the tail layout using a sharp knife or marking gauge. Cut the pins and remove the waste, again working to the baseline. The joint should fit together with the tails sliding into the sockets in the drawer front, leaving a flush surface on the front.
Fitting half-blind dovetails often requires fine-tuning. The joint should be tight enough to hold together without glue but not so tight that it requires excessive force. A shoulder plane or chisel can be used to adjust the cheeks of the pins or the sockets. When assembled, the joint should pull the drawer front tight against the side, ensuring a strong and square drawer. Because the end grain of the front is not visible, any minor gaps in the joint are less noticeable, but attention to detail still matters for structural integrity.
Secret Dovetails: Concealed Elegance
Secret dovetails, also known as mitered dovetails, are used when the woodworker wishes to conceal the joint entirely, presenting a continuous surface on both the front and side of the drawer. This is achieved by combining a miter on the visible corner with a dovetail joint set back from the corner. The result is a joint that appears as a simple miter but has the internal strength of a dovetail. Secret dovetails are often found in fine furniture and drawers where a clean, uninterrupted appearance is desired, particularly when using highly figured or expensive woods.
The cutting process for secret dovetails is more complex than for through or half-blind types. Begin by cutting a 45-degree miter on the ends of both boards. Then, lay out the dovetails on the inner faces, setting them back from the mitered edge by a distance equal to the thickness of the miter. The tails are cut on one board and the pins on the other, but the cuts must be angled and positioned so that when assembled, the miter closes tightly and the dovetails interlock inside. The waste is removed carefully with a chisel, and the joint is test-fitted. Because the dovetails are hidden, any gaps inside are not visible, but they can affect strength, so a good fit is still important.
Assembling secret dovetails requires attention to the miter. Glue is applied to both the mitered surfaces and the dovetail surfaces. The joint is then carefully tapped together, ensuring the miter aligns perfectly. Clamping can be tricky because the miter is fragile, so use cauls or a miter clamp to distribute pressure evenly. Once the glue dries, the corner can be planed or sanded flush, revealing only the miter line. Secret dovetails are a mark of high craftsmanship and are often used in heirloom-quality pieces.
Step-by-Step Cutting Guide for Through Dovetails
This section provides a detailed procedure for cutting through dovetails, which serves as a foundation for the other types. The steps assume the use of hand tools, but the sequence can be adapted for power tools. Begin by selecting straight-grained timber that is free of defects. For drawers in the UK, common hardwoods include oak, ash, and walnut, while softwoods like pine are also used for painted drawers. Ensure the boards are squared and cut to final dimensions.
- Mark the baseline on all four sides of both boards using a marking gauge set to the thickness of the mating board. The baseline indicates the depth to which the tails and pins will be cut.
- On the pin board (usually the drawer side), divide the width into equal parts for the tails. Use a dovetail marker or bevel gauge set to a ratio of 1:6 or 1:8, depending on the wood’s hardness. For hardwoods, a 1:8 ratio is common; for softwoods, 1:6 provides greater strength.
- Transfer the tail layout to the end grain of the pin board. Use a sharp pencil or knife to mark the lines. Then, extend these lines down the face of the board to the baseline.
- Secure the pin board in a vise and cut along the waste side of the tail lines with a dovetail saw. Keep the saw vertical for the pins and angled for the tails. Remove the waste between the tails with a chisel, working from both faces to avoid splintering.
- Place the tail board (the drawer front or back) on top of the pin board, aligning the baselines. Use a marking knife to transfer the tail shapes onto the end grain of the tail board. Then, extend these lines down to the baseline on the tail board.
- Cut the pins on the tail board, again sawing on the waste side of the lines. Remove the waste with a chisel, carefully paring to the baseline.
- Test the fit by dry-assembling the joint. The tails should slide into the pins with light resistance. If too tight, pare the pins slightly; if too loose, consider using a shim or recutting the joint.
- Once satisfied, apply glue to all mating surfaces and assemble the joint. Tap gently with a mallet, check for square, and clamp if needed. After the glue cures, trim any protruding ends flush with a block plane or chisel.
This process can be repeated for multiple drawers, and with practice, the speed and accuracy will improve. Remember that sharp tools are essential; a dull chisel or saw can tear the wood and compromise the joint. Oak & Grain recommends regular honing of edges and maintaining a consistent sawing rhythm.
Tools, Materials, and Fitting Techniques
Successful dovetail cutting depends on having the right tools and understanding how to use them effectively. A dovetail saw with fine teeth and a stiff back is essential for precise cuts. Chisels in various widths—typically 6mm, 12mm, and 20mm—are needed for waste removal and paring. A marking gauge with a sharp pin or knife wheel ensures accurate baselines, while a dovetail marker or bevel gauge helps set the correct angle. For layout, a fine mechanical pencil or marking knife provides clear lines. A mallet for assembly and a block plane for trimming are also important. In the UK, many woodworkers prefer brands like Lie-Nielsen or Veritas, but vintage tools can also produce excellent results if properly tuned.
When selecting materials, consider the wood’s hardness and grain direction. Hardwoods like oak and ash hold crisp details but require sharp tools and a slightly steeper dovetail angle (1:8). Softwoods like pine are more forgiving but can crush easily, so a 1:6 angle is often used. The drawer sides should be of a consistent thickness, typically 12–15mm for small drawers and 15–20mm for larger ones. The drawer front may be thicker, but the dovetail tails are cut to match the side thickness. Always mill your timber to final dimensions and allow it to acclimate to the workshop before cutting joints.
Fitting techniques vary with the type of dovetail. For through dovetails, the joint should be snug but not forced; a light tap with a mallet should seat it. Half-blind dovetails require careful paring of the pin sockets to achieve a flush front. Secret dovetails demand precision in the miter and the internal dovetails. In all cases, test the fit frequently during the cutting process. If a joint is too tight, identify the high spots with chalk or carbon paper and pare them away. If too loose, you may need to recut the joint or use a filler made from sawdust and glue, though this is not recommended for structural joints. Proper technique and patience will yield joints that are both strong and visually pleasing.