Applying Oil Finishes to Hardwood Furniture
Oil finishes are a traditional method for enhancing the natural beauty of hardwood furniture while offering a degree of protection. Unlike surface finishes that sit atop the wood, oils penetrate into the fibres, enriching the grain and creating a depth of colour that many find appealing. This article explores the characteristics of tung, linseed, and Danish oils, and outlines application schedules that can be adapted to different workshop practices. The information provided is intended for educational purposes and should be evaluated in the context of specific project requirements and environmental conditions.
Understanding the properties of each oil type is essential for achieving consistent results. Factors such as drying time, sheen level, and maintenance requirements vary, and the choice of oil can influence the final appearance and durability of the piece. Additionally, proper surface preparation and application techniques play a significant role in the outcome. This discussion aims to provide a balanced overview, acknowledging that individual results may vary based on wood species, ambient conditions, and the number of coats applied.
Types of Oil Finishes for Hardwood Furniture
Oil finishes can be broadly categorised into three main types: drying oils, semi-drying oils, and non-drying oils. For furniture applications, drying oils such as tung and linseed are commonly used because they cure through oxidation, forming a protective layer within the wood. Danish oil, on the other hand, is often a blend of oils and resins, offering a combination of penetration and surface protection. Each type has distinct working properties and typical use cases.
Tung oil, derived from the nuts of the tung tree, is renowned for its water resistance and durability. It cures to a hard, slightly glossy finish and is often favoured for high-use items like dining tables and chairs. However, pure tung oil can be expensive and has a relatively long drying time, which may require extended intervals between coats. Some formulations include additives to accelerate curing, but these may alter the natural appearance.
Linseed oil, pressed from flax seeds, is another traditional drying oil. It is more economical than tung oil but tends to yellow over time, which may be undesirable on light-coloured woods. Raw linseed oil has a very slow drying time, while boiled linseed oil contains metallic driers that speed up the process. It is important to note that boiled linseed oil is not actually boiled but treated with additives; proper ventilation and disposal of rags are critical due to the risk of spontaneous combustion.
Danish oil is typically a mixture of tung or linseed oil with varnish or polyurethane, along with solvents. This blend allows for easier application and a faster build-up of sheen. It provides moderate protection and is often used as a wipe-on finish for both interior and exterior furniture. The exact composition varies by manufacturer, so testing on a sample piece is advisable to assess compatibility with the wood species and desired look.
Surface Preparation and Application Techniques
Proper surface preparation is crucial for any oil finish. The wood should be sanded progressively through grits, usually ending at 180 to 220 grit for most hardwoods. Sanding removes mill marks and creates a uniform surface that accepts oil evenly. After sanding, all dust must be removed using a tack cloth or a vacuum, as residual particles can interfere with absorption and lead to an uneven finish.
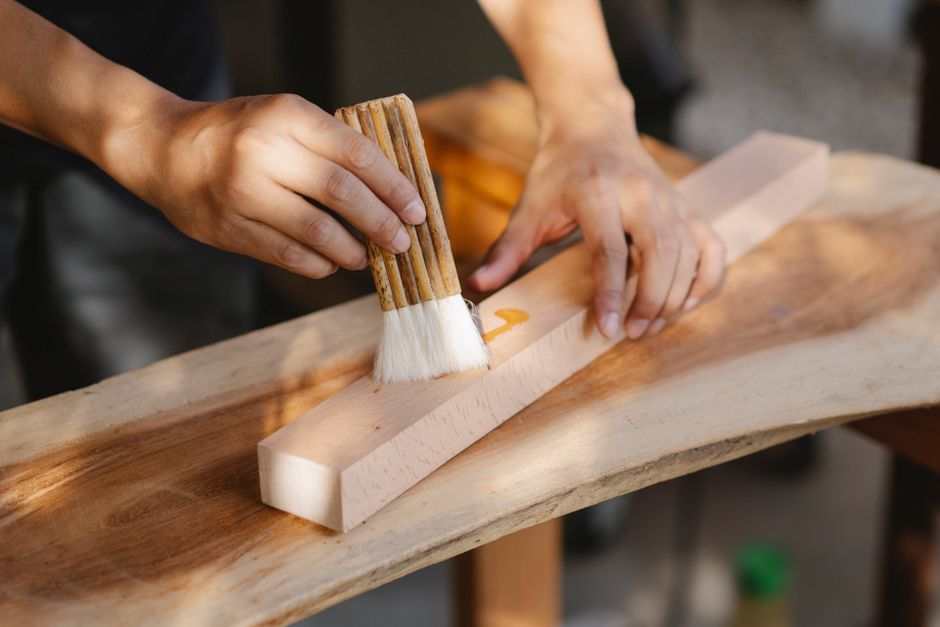
Application methods for oil finishes include wiping, brushing, and flooding. Wiping with a lint-free cloth is common for Danish oil and other blends, allowing controlled application and easy removal of excess. Brushing is often used for pure tung oil, as it can be applied more liberally and worked into the grain. Flooding involves applying a generous amount of oil and allowing it to soak in for a period before wiping off the excess; this method can deepen penetration but requires careful monitoring to avoid tackiness.
When applying oil, it is generally recommended to work in a well-ventilated area and to wear appropriate personal protective equipment, such as gloves and a respirator, especially when using products containing solvents. The oil should be applied in thin, even coats, following the direction of the grain. After each coat, the surface should be allowed to dry according to the manufacturer’s instructions, which may range from a few hours to several days depending on the product and environmental conditions.
Between coats, a light scuffing with fine abrasive pads or steel wool can improve adhesion and smoothness. However, this step should be done gently to avoid cutting through the previous coat. It is also important to note that oily rags can self-ignite; they should be spread out flat to dry in a well-ventilated area or submerged in water before disposal, following local regulations.
Application Schedules for Tung, Linseed, and Danish Oils
The number of coats and the interval between them depend on the desired level of protection and the specific oil used. A typical schedule for tung oil might involve applying three to five coats, with 24 to 48 hours of drying time between each. The first coat is often thinned with a solvent to enhance penetration, while subsequent coats are applied at full strength. After the final coat, the surface may be buffed to achieve a satin sheen.
For linseed oil, a similar approach can be taken, but drying times may be longer, especially for raw linseed oil. Boiled linseed oil dries faster, often within 12 to 24 hours, but multiple coats are still needed to build a protective film. A common schedule involves applying two to three coats, with light sanding between coats to remove raised grain. It is worth noting that linseed oil finishes may require more frequent maintenance than tung oil.
Danish oil application schedules are often more flexible because the product contains driers and resins. A typical schedule might consist of two to three coats, with 4 to 6 hours between coats and a final curing period of 24 hours before use. Some manufacturers recommend wet-sanding the first coat with fine grit sandpaper to create a slurry that fills the pores, resulting in a smoother finish. However, this technique should be tested on a sample to ensure compatibility.
Regardless of the oil chosen, environmental factors such as temperature and humidity can significantly affect drying times. In cooler, more humid conditions, longer intervals may be necessary. It is advisable to monitor the surface and adjust the schedule accordingly, rather than adhering strictly to a fixed timeline.
Maintenance and Long-Term Considerations
Oil-finished furniture typically requires periodic maintenance to retain its appearance and protective qualities. Over time, the finish may become dry or worn in high-traffic areas, and a fresh coat of oil can revitalise the surface. Cleaning with a mild soap and water solution, followed by drying, is generally sufficient for routine care. Avoid using harsh chemicals or abrasive cleaners, as these can strip the oil and damage the wood.
For deeper scratches or dents, spot repair may be possible by applying oil directly to the affected area and blending with the surrounding finish. However, results can vary, and it may be necessary to refinish the entire surface for a uniform look. In some cases, a professional restorer may be consulted to assess the condition and recommend appropriate action.
It is important to recognise that oil finishes are not impervious to damage. They offer less resistance to heat, alcohol, and water rings compared to some film-forming finishes. Therefore, the level of protection should be matched to the intended use of the furniture. For pieces subject to heavy use, additional protective measures such as coasters and placemats can help prolong the finish.
At Oak & Grain, we emphasise the importance of understanding the characteristics of different finishes to make informed decisions. By considering the specific requirements of each project and the environmental conditions, it is possible to achieve a finish that enhances the natural beauty of hardwood furniture while providing a reasonable level of protection.